Attach a Custom Domain
LocalOps offers its customers the convenience of adding custom domains to their App Environments, allowing for personalized and professional web addresses. Additionally, LocalOps ensures that every configured custom domain is automatically protected with SSL, providing enhanced security and encryption for your web traffic by default. This seamless integration of custom domains with SSL protection ensures that your application not only stands out with a unique domain but also adheres to best practices in security and trustworthiness.
After successfully attaching a custom domain, users will no longer be able to access their App Environment using the default URL generated by LocalOps. From that point forward, users must use the custom domain to access their App Environment.
Steps
1. Add your domain
- Login to your LocalOps account, if you do not have LocalOps account already then signup here
- Go to App Environments list page and click on the App Environment for which you have to configure custom domain.
note
You will need to have a running App Environment for which you will be adding a Custom Domain. If you do not have an App Environment running already then follow this article to create one.
- Click on Custom Domain tab to open custom domain settings section.
- In the custom domain settings section, you will find the App Environment's current domain and a "Change domain" button.
- Click on the "Change domain" button and type in your custom domain in the text box.
- Click "Save".
Clicking "Save" button will give you DNS records to add to your domain DNS settings (refer below screenshot).
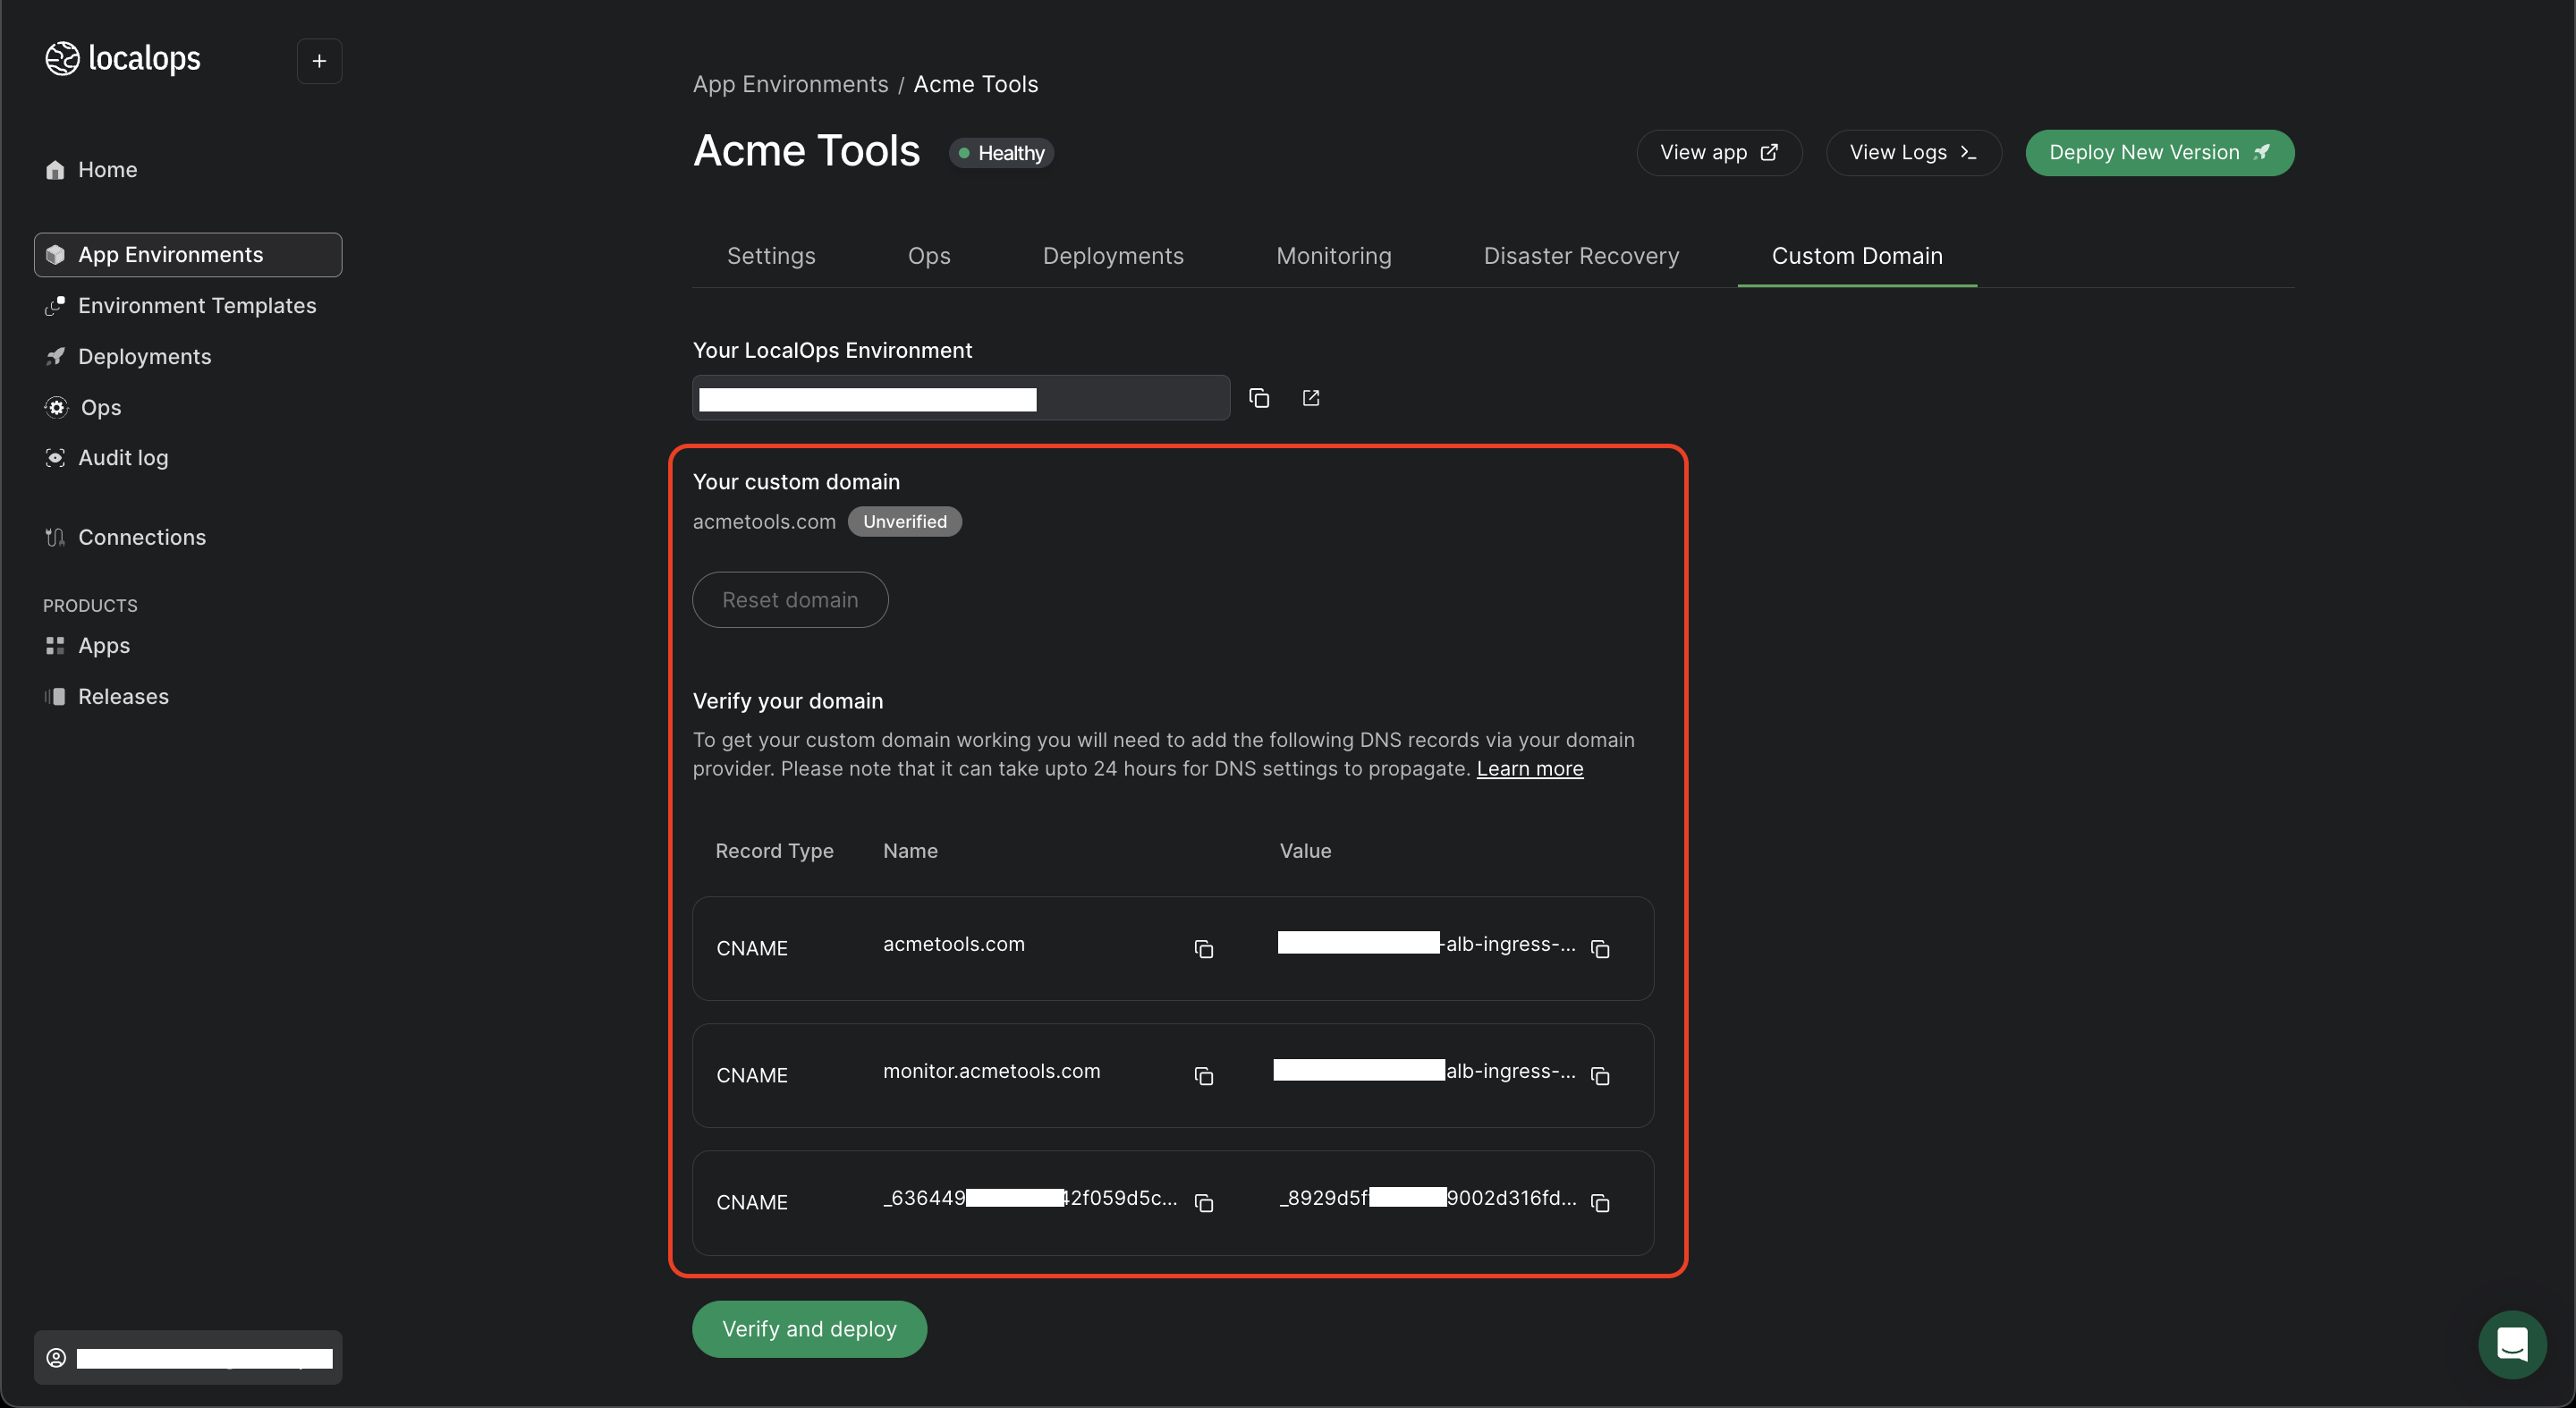
In next step, we will use these DNS records to verify the ownership of your domain and to route traffic from your domain to your App Environment.
2. Verify your domain
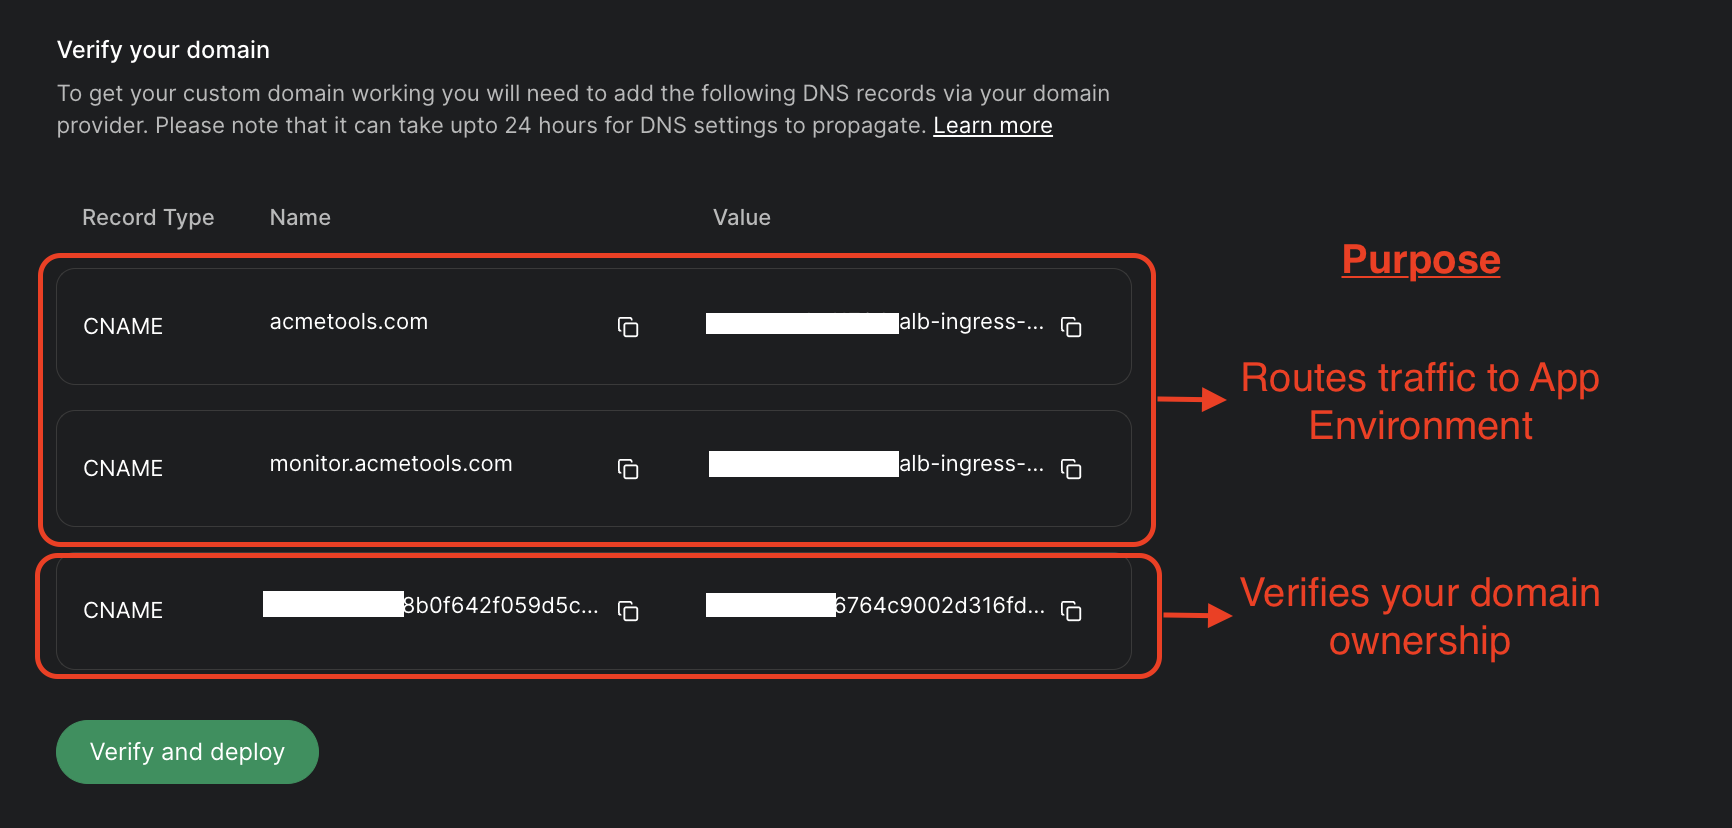
In this step you will verify the ownership of your domain by adding a CNAME records to your DNS settings. And additionally you will be adding 2 more CNAME records to your DNS settings to route traffic from your domain to your LocalOps App Environment. So on total you will be adding 3 CNAME records to your DNS settings to setup custom domain for your App Environment.
Please refer below screenshot to know the purpose of each CNAME records.
After saving the DNS settings, usaully it takes few minutes for the newly added DNS settings to propagate, sometimes it may also take up to 24 hours.
3. Deploy
Once you have added the given CNAME records to your domain's DNS settings give it few minutes for the DNS settings to propagate. Then click on "Verify and deploy" button.
If domain verification fails then give it few more minutes for the newly updated DNS settings to propagate and try again. If it still fails then check whether you have properly configured the given CNAME records in your domain's DNS settings.
Once the domain verification is successful, system will automatically create an Op (Operation) on the chosen App Environment to deploy the newly configured Custom Domain. Wait for the op to complete.
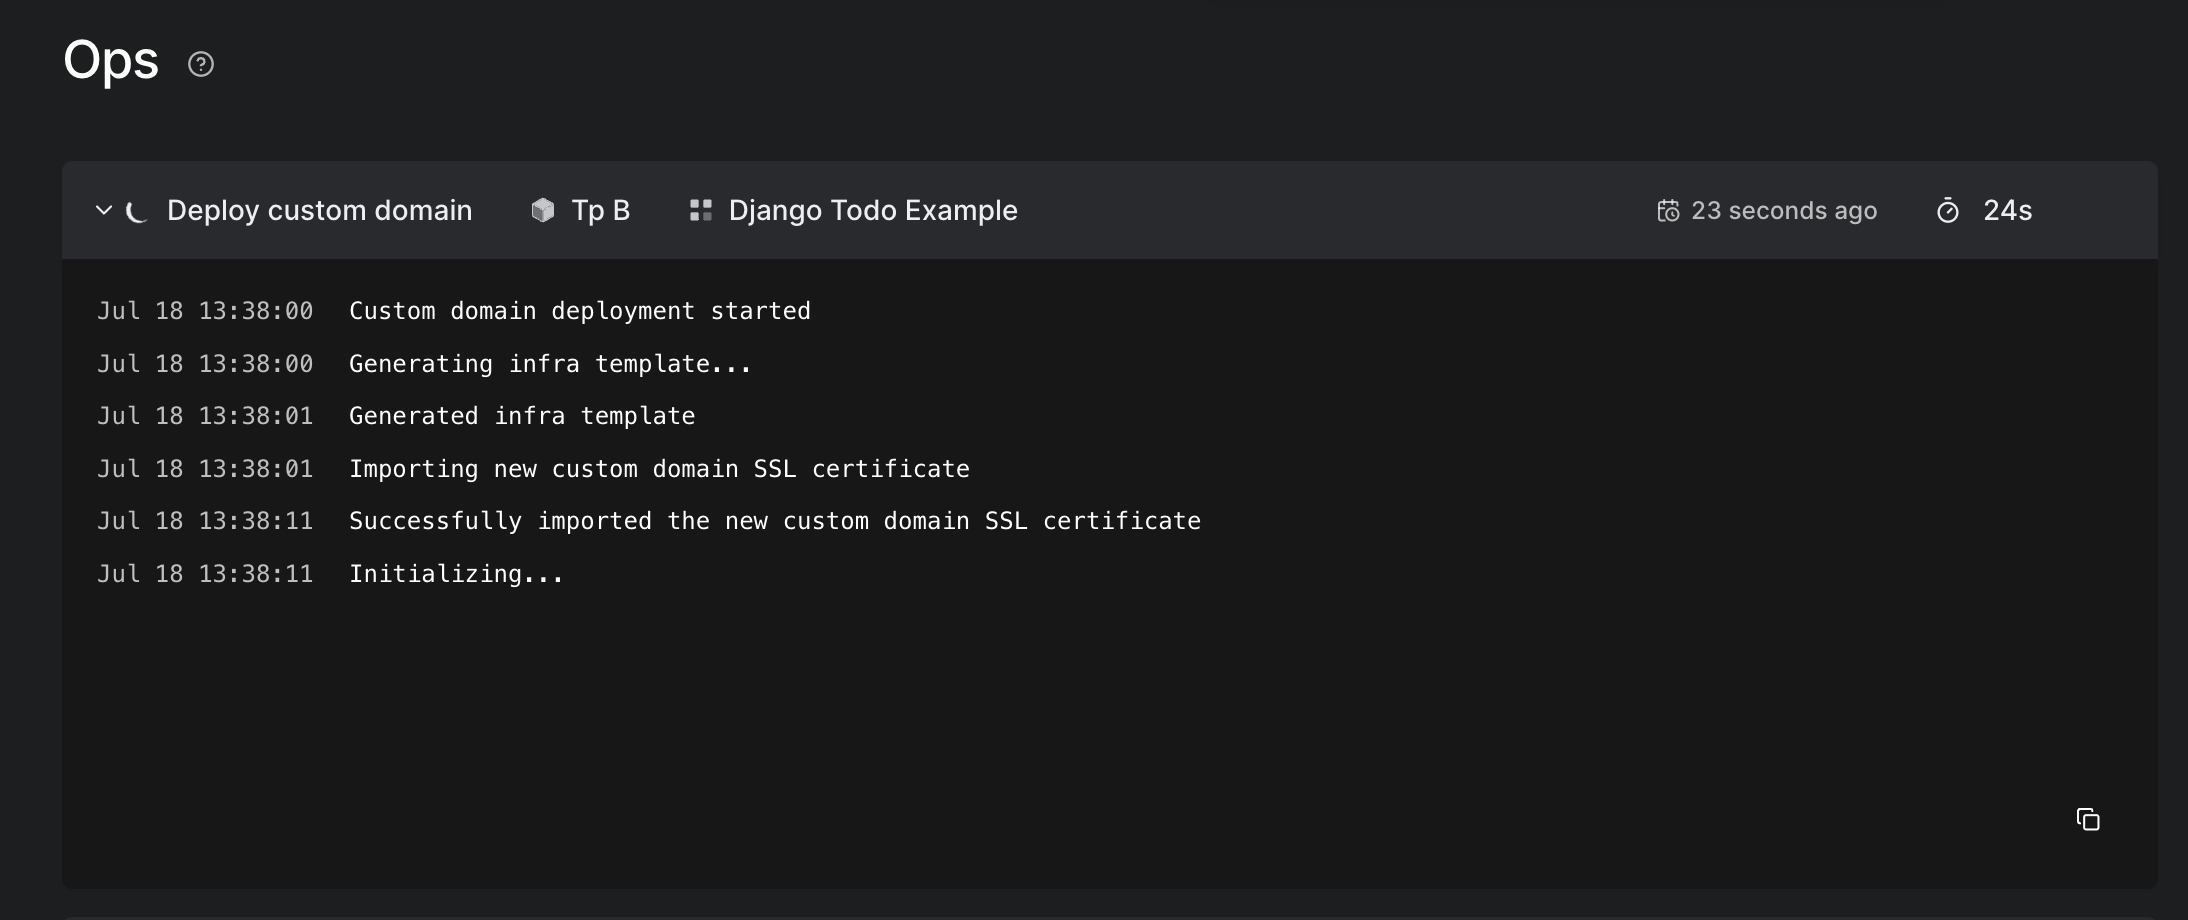
After the Op is successful, your App Environment's URL will be updated and you can verify it by loading your custom domain in a browser tab to check whether it loads your app that is running in LocalOps App Environment.
Hurrey! You have successfully setup Custom Domain for your App Environment. 🎉